%20Recipe.jpg)
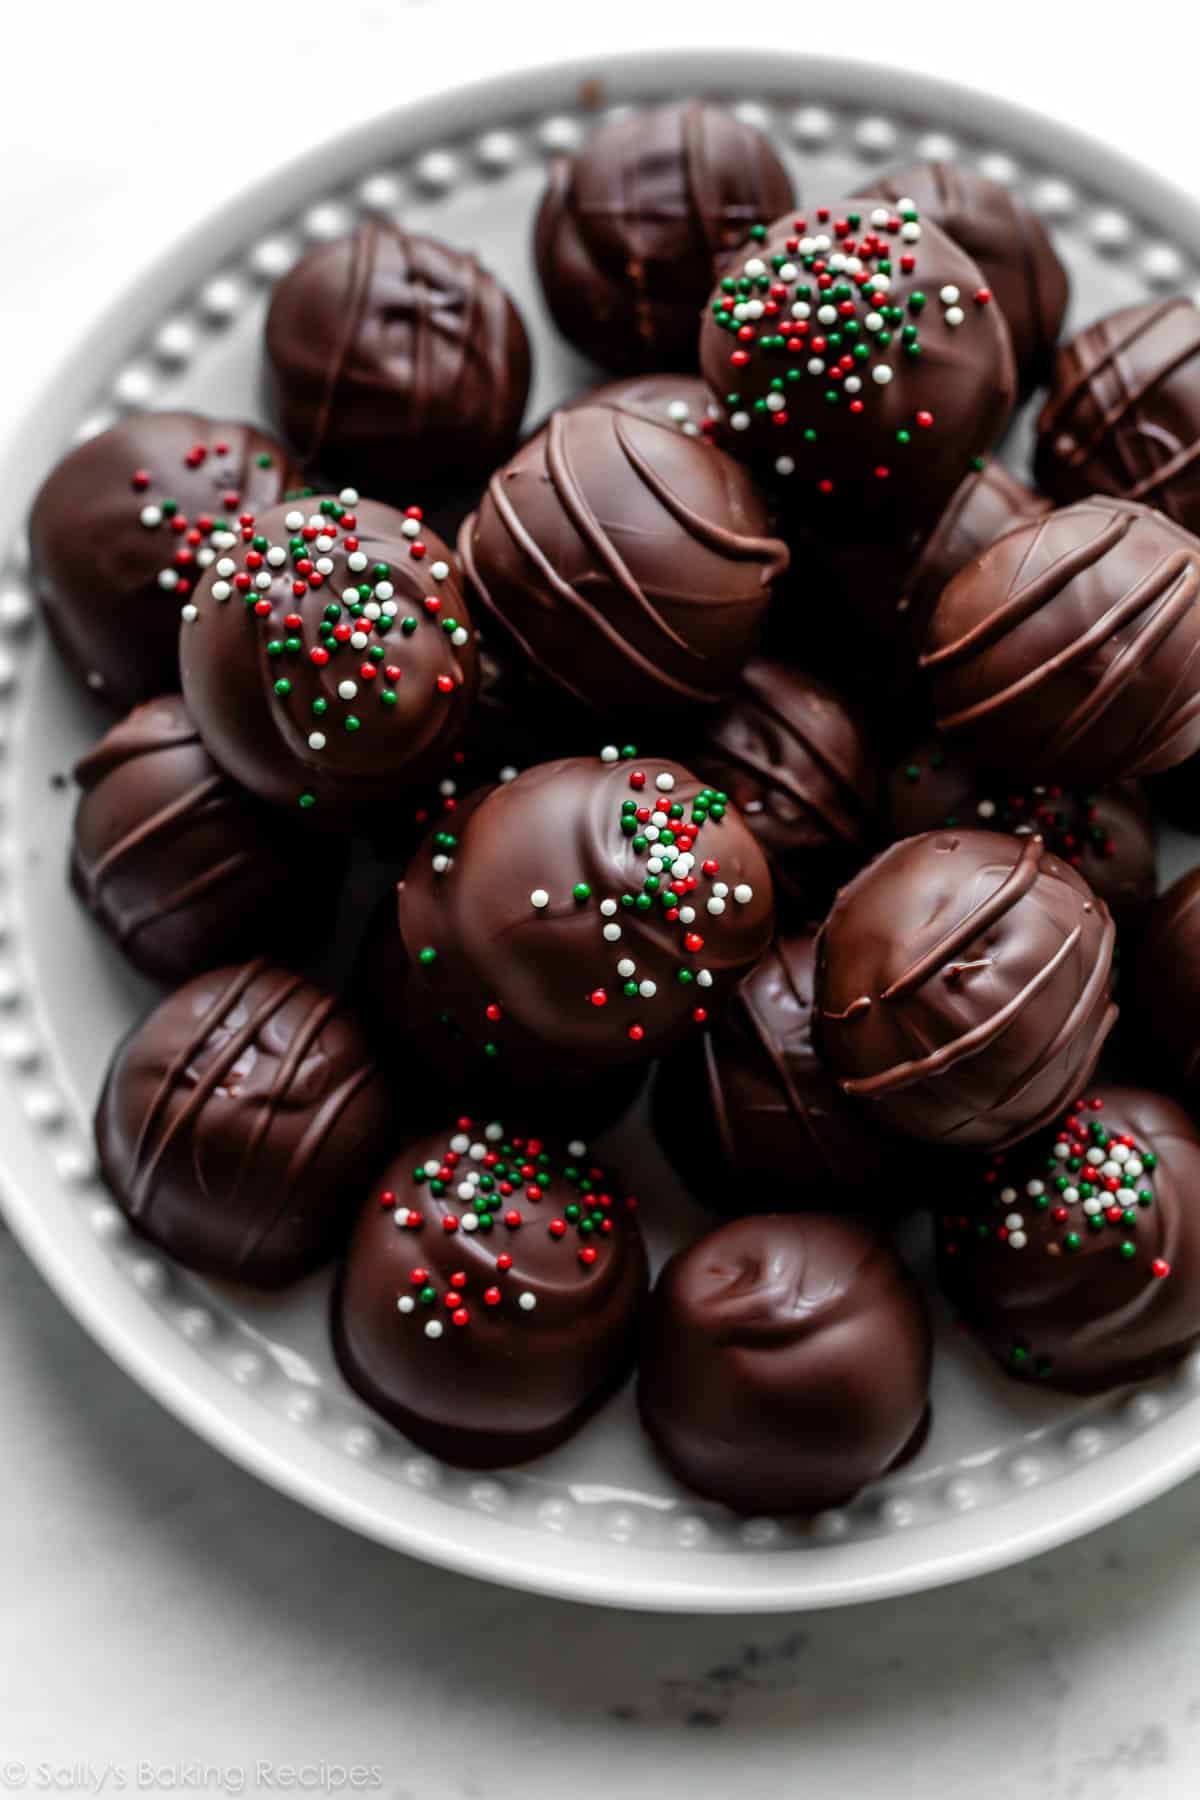
Peanut Butter Balls (Truffles) Recipe
Honestly the Best Peanut Butter Balls
And here’s why:
- Soft + creamy peanut butter filling
- Smooth + rich chocolate coating
- Easy to make no-bake recipe
- Make-ahead & freeze beautifully
- Recipe doubles easily, and a tin of these makes a wonderful gift
Think of these no-bake candies as peanut butter bars in truffle form. My peanut butter bars have a bit more substance from the graham cracker crumbs. These peanut butter balls, on the other hand, have a purely creamy peanut butter filling. (And they’re even more wildly delicious than they sound, I swear.)
Best Ingredients to Use & Why:
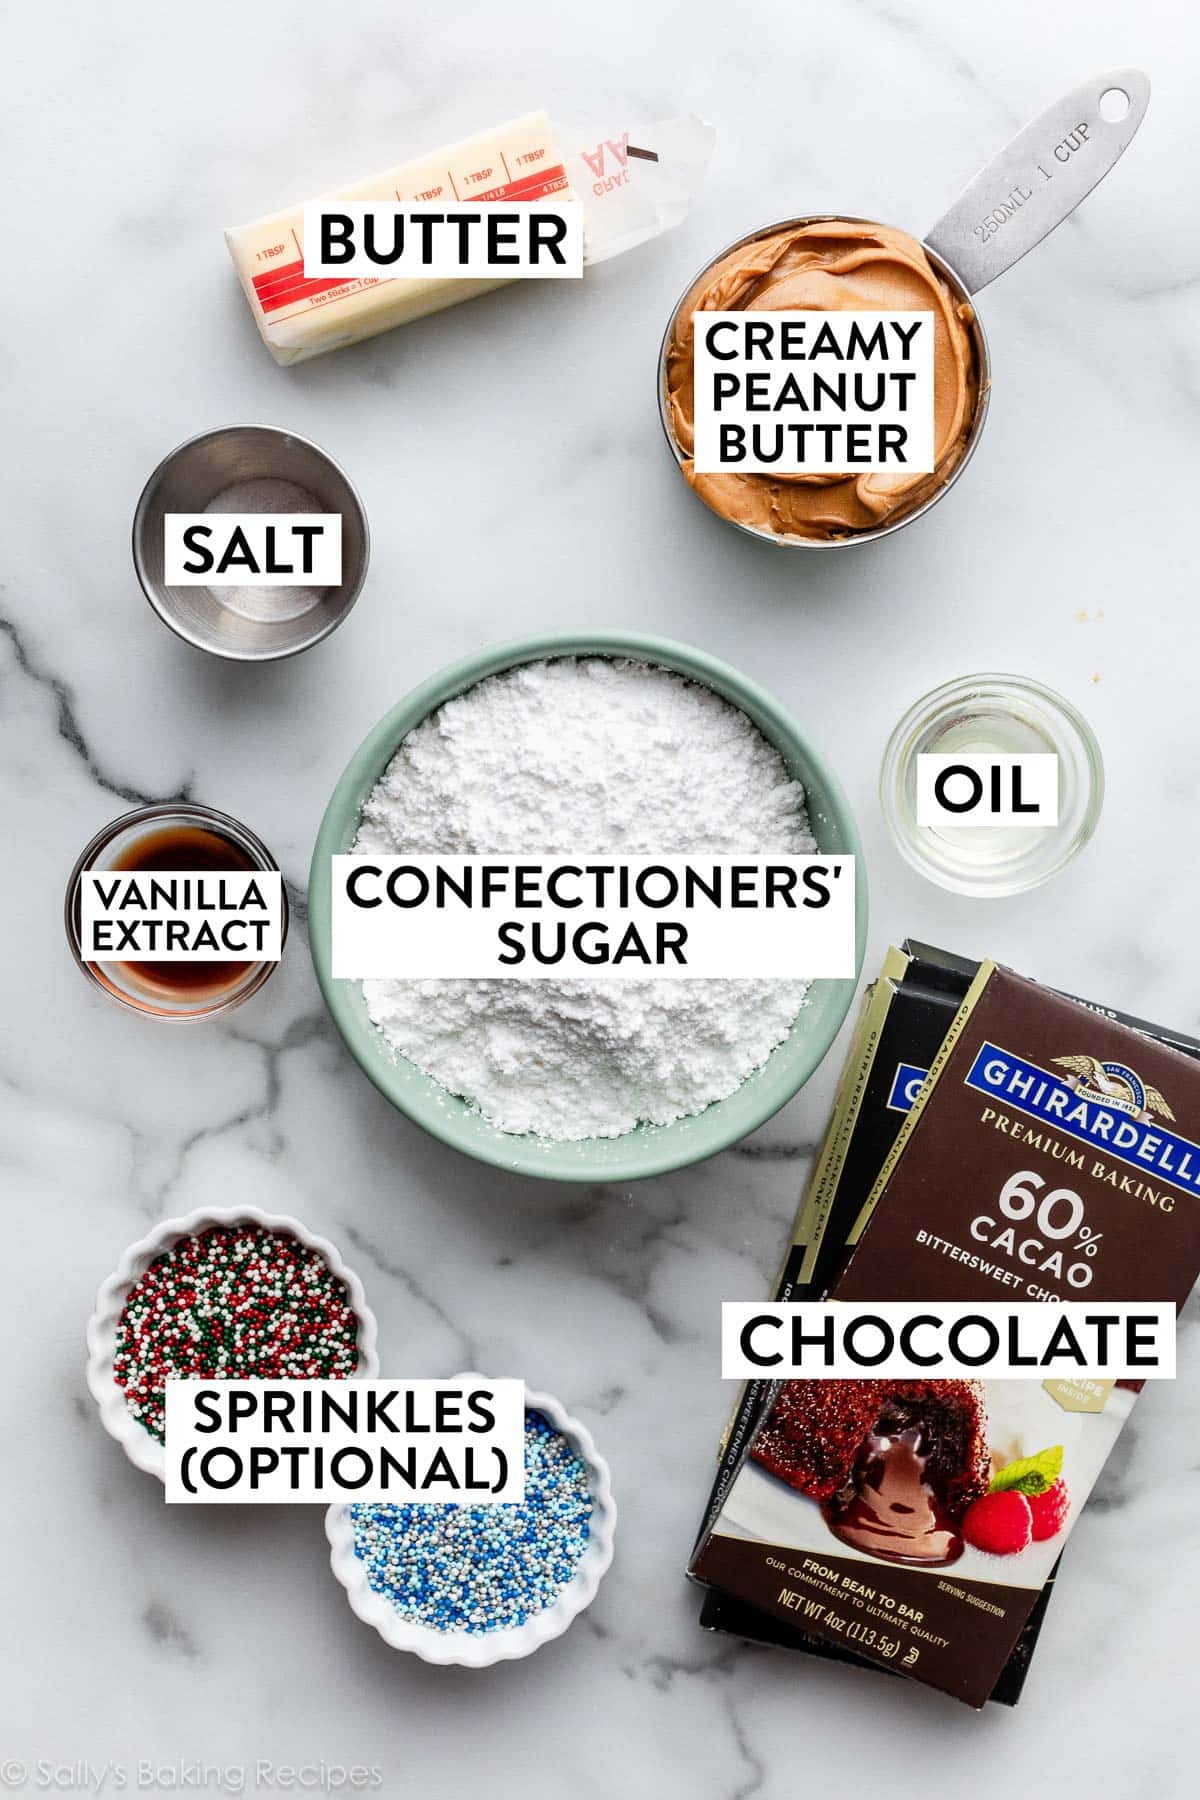
- Softened Butter: Start with room-temperature butter. Overly soft or melted butter will sabotage your efforts from the start. Good rule of thumb: let the butter sit out on the counter for 1 hour before beginning the recipe. You can use salted or unsalted butter; if using salted, no need to adjust the added salt in the recipe—I promise these are plenty sweet either way.
- Creamy Peanut Butter: As you can guess, peanut butter is the main ingredient. For the best texture, use processed creamy peanut butter such as Jif or Skippy, the same kind I recommend for peanut butter blossoms and peanut butter frosting. Natural-style peanut butter is wonderful for eating and cooking, but I do not recommend it for this recipe because the filling will be too dry and crumbly.
- Confectioners’ Sugar: Confectioners’ sugar binds everything together and adds sweetness. Without this powdery sugar, the peanut butter filling will be too liquid.
- Vanilla Extract: For a little extra flavor, use vanilla extract.
- Salt: Salt offsets the sweetness.
- Chocolate: Just as if you were making chocolate truffles, use pure baking chocolate. Do not use chocolate chips because they do not melt properly. I list all of my advice about the chocolate coating below.
- 1 Teaspoon Vegetable Oil: Melted chocolate can be a little too thick to smoothly coat the candies, so add a small splash of vegetable oil to help thin it out.
Optional: festive sprinkles, of course!
How to Make Peanut Butter Balls
Let me show you the process, so you know what to expect when it’s your turn to try these treats. First, when you beat the butter and peanut butter together, the mixture will be quite thin (below, left). After you add the remaining filling ingredients, expect a crumbly dough-like mixture (below, right).
I promise the crumbly dough will come together with your hands as you roll.
Scoop and measure 1 scant Tablespoon (about 18g) each. Roll into balls.
Chill the rolled balls for 1 hour in the refrigerator. Freezing them works too, but frozen peanut butter balls are difficult to coat in chocolate because the chocolate will slide off or crack. No shortcuts here, just refrigerate for 1 hour or up to 1 day.
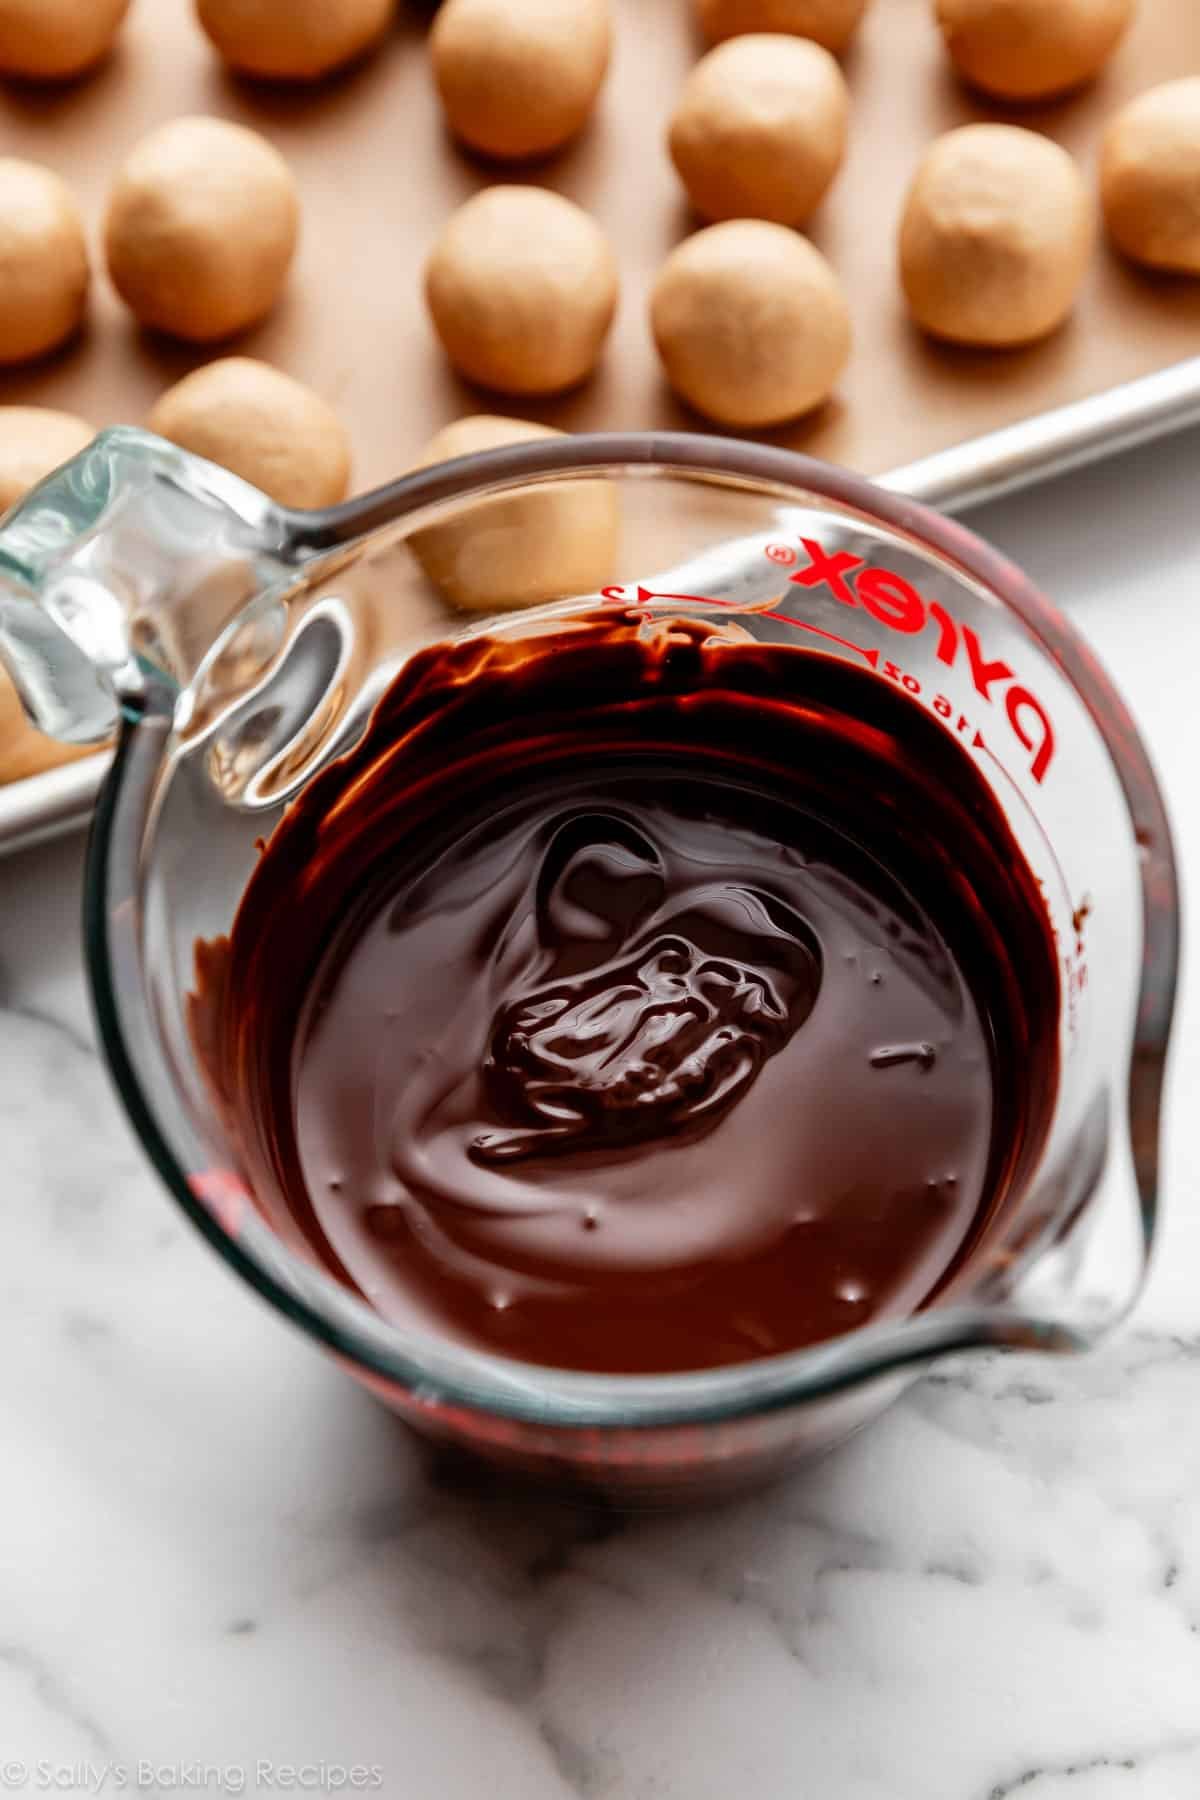
Dip in melted chocolate. If you have any chocolate leftover, drizzle on top. Add sprinkles, if desired, and then let the chocolate set.
5 Success Tips for Dipping in Chocolate
I have made a lot of coated candies, and even have an entire cookbook dedicated to candy-making. In my experience, I have learned some *key* success tips for coating various candies. See below, apply these tips, and the process should be a breeze.
- Use real chocolate. For the BEST looking and tasting candies, start with real chocolate. Use the 4-ounce “baking chocolate” bars you can find in the baking aisle of the grocery store. I prefer Baker’s or Ghirardelli brands. You need to chop up three 4-ounce (113g) bars for this recipe, or 12 ounces (339g) total. Melting wafers also work, and for those, I recommend Ghirardelli brand. You can use milk, semi-sweet, dark, or even white chocolate. Be warned that using all white chocolate will produce a VERY sweet candy. Instead, I recommend dark/bittersweet or semi-sweet chocolates. Do not use chocolate chips. Save them for your chocolate chip cookies!
- Melt the chocolate properly. You can use a double boiler, but I usually just use the microwave. Place the chopped chocolate in a microwave-safe bowl or glass liquid measuring cup. Microwave in 20-second increments, stirring after each. Chocolate is temperamental, so always melt with care. I do not recommend tempering the chocolate for this recipe. Tempered chocolate isn’t refrigerated, and due to the butter in the filling, these candies should be refrigerated.
- Let the chocolate cool down for a few minutes. Otherwise it will melt the cold filling.
- Use a dipping tool to help. I use this spiral dipping tool for dipping chocolate truffles and Oreo balls, and it works just as well here. Place a peanut butter ball in the melted chocolate, and lift it back out again with the dipping tool. Quickly flip it upside down onto a lined baking sheet. If you don’t have a dipping tool, simply use a fork to lift the dipped ball out of the chocolate and use a toothpick (or another fork) to slide the ball onto the lined baking sheet.
- Allow the chocolate to set. Top the still-wet chocolate with sprinkles, if using, and if you have leftover chocolate, feel free to drizzle it on top—you can use a spoon or squeeze bottle for that. Place the baking sheet with the chocolate-covered peanut butter balls in the refrigerator to set the chocolate.